|
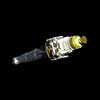
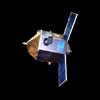
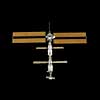
These spacecraft images are PICT files with totally black backgrounds, ready for use with Starry Night Pro and Starry Night Backyard. Most of the images are from photographs. Each full-size image is close-trimmed, without the extra background you see here. Installation instructions are below.
Set 1
|
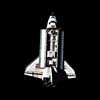
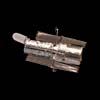
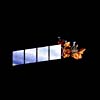
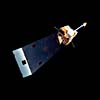
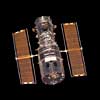
Download Set 1: Space Shuttle Discovery, the Hubble Space Telescope (HST), the Upper Atmosphere Research Satellite (UARS), the now-defunct Compton Gamma Ray Observatory (GRO), and Landsat 7. Thanks to Jim Cook, who gave me three of these shots!
Set 2
|
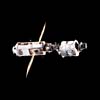
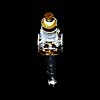
Download Set 2: The International Space Station as of January 2000 (Zarya and Unity, a better image than the one that comes with Starry Night), an early Soviet COSMOS, two Geostationary Operational Environmental Satellites (GOES, the D-F and I-M variants), and the International Ultraviolet Explorer (IUE).
Set 3
|
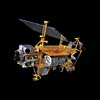
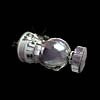
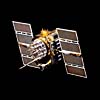
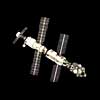
Download Set 3: The Chandra X-Ray Observatory, a Navstar GPS satellite, the Starship Enterprise (ST:TMP version), the International Space Station “Alpha” as of October 2000 (includes the Progress module!), and TELSTAR 1 (not still active, but I attached it to TELSTAR 303 just to have a different image).
Set 4
|
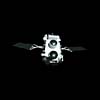
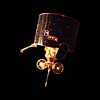
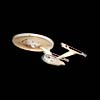
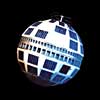
Download Set 4: The Hubble Space Telescope (alternate image), Space Station One from the film 2001: A Space Odyssey, the Chandra X-Ray Observatory (alternate image), the Hipparcos satellite, and the International Space Station “Alpha” as of December 2000 (includes one set of big solar panels).
Jim Cook has a few different images on his Web site, as does Darren Osborne. If you learn of any others, please let me know!
To install these images, just follow these steps:
Download a set. Each set is contained in a zip archive.
Unpack the archive. If you don’t have WinZip (PC) or ZipIt (Mac), you can just drop the archive on Version 5 or later of Aladdin Expander (PC) or StuffIt Expander (Mac), available free from Aladdin Systems.
Drop the images into Starry Night’s Planet Images folder, which is inside the Starry Night Pro Data or Starry Night Backyard Data folder.
Launch Starry Night. Open the Planets palette. Click the Satellites arrow to expand the list. Scroll down until you find the satellite you want to add an image for. Select that satellite, and click the Edit button.
Choose the Surface tab. On the left side (No atmoshpere), click the Set... button. Navigate to the Planet Images folder and choose the image you want. Click Open.
Click Save.
To view a new satellite image, go to the chosen satellite. Center and lock it. Depending on the version of Starry Night you have, you may be just 3 meters above the satellite, or you may be 60 meters away. If you’re too close, the image will not appear. Use the upward-pointing rocket ship, and the satellite will pop into view when you are about 11 meters away from it. Depending on the size of the image, you might want to move farther away to get the best view.